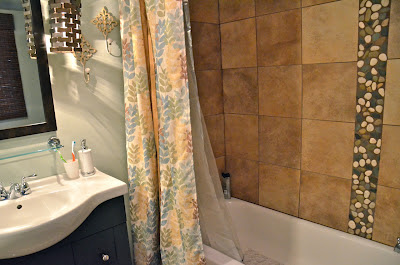
My bathroom renovation project is finally over. Existing was powder blue
walls, paneling and white tile with black grout lines. This was all
going to be removed! Starting from a clean slate meant I could choose
anything. But my challenge was how to mix my modern, artistic styles
with an old 1940's cabin feeling home. I wanted something earthy and
natural feeling with a calming effect.
 |
| After Picture: New fresh looking tile and bright colors! |
 |
Before Picture: Old shower surround
with missing glass doors, so bad it
wasn't used in years. |
 |
Before Picture: During the project we
decided to move the door so we could layout
the bathroom in a more logical manner. |
I
wanted to keep it simple, so I started with a 13"x13" beige tile on the
floor as well as the walls of the tub surround. I love the look of the
natural river pebbles, however since I had a tub, and no shower floor I
decided to use the pebbles as a border on the wall. The
Maniscalco Botany Bay Blend Pebbles
worked the best because of their color range, from blues to greens that
pulled out the other color tones I was working with in the room.
 |
Before Picture: Notice the outdated light fixtures and vanity,
simple changes made a big impact on the space. |
By
choosing two different patterns I separated the floor and wall spaces.
The offset joints break up the space giving it a more interesting
pattern than laying the tiles square. The vertical border in the shower
helps to give a taller appearance and enhances my tiny bathroom. Subtle
details (lighting fixtures, blinds, and fabric) in this room really
pulled everything together. What do you think?


No comments:
Post a Comment